Install
How to install Microsoft Windows 11 on VirtualBox!
Info
The following step-by-step guide shows how to install Microsoft Windows 11 on top of VirtualBox 6.1; this guide has been tested and verified on both macOS as well as Linux hosts. This is to address the reported issue that Windows 11 could not be installed as a VirtualBox VM.
Configuring Virtualbox for Windows 11
Note
The first step is to properly configure the virtual machine that will guest the “Microsoft Windows 11” Installation; the virtual machine has to be configured in the following way (minimum requirements), based on official “Windows 11 Specs and System Requirements” and your system needs to have proper updated x86 CPU:
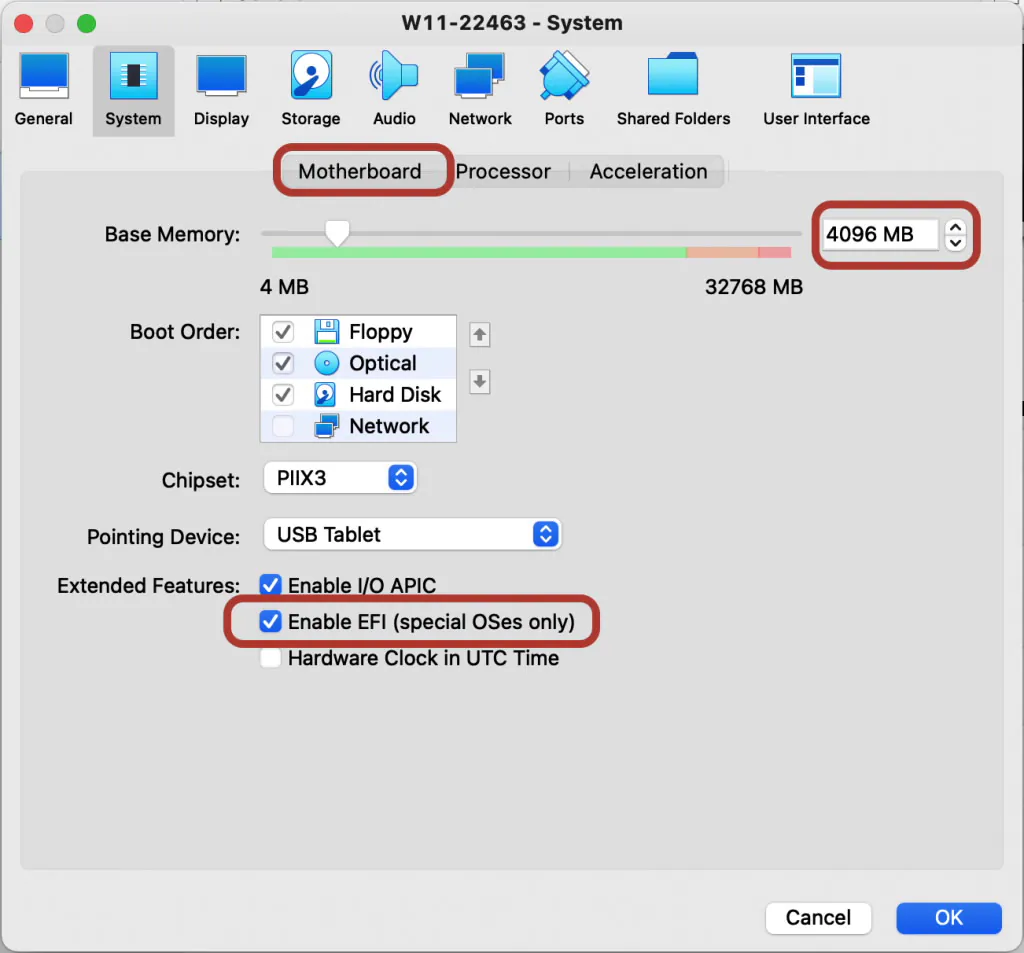
Configuration: System - Motherboard
| RAM: 4GB (minimum) - 8GB (minimum suggested)
EFI (Special OSes only) enabled
|
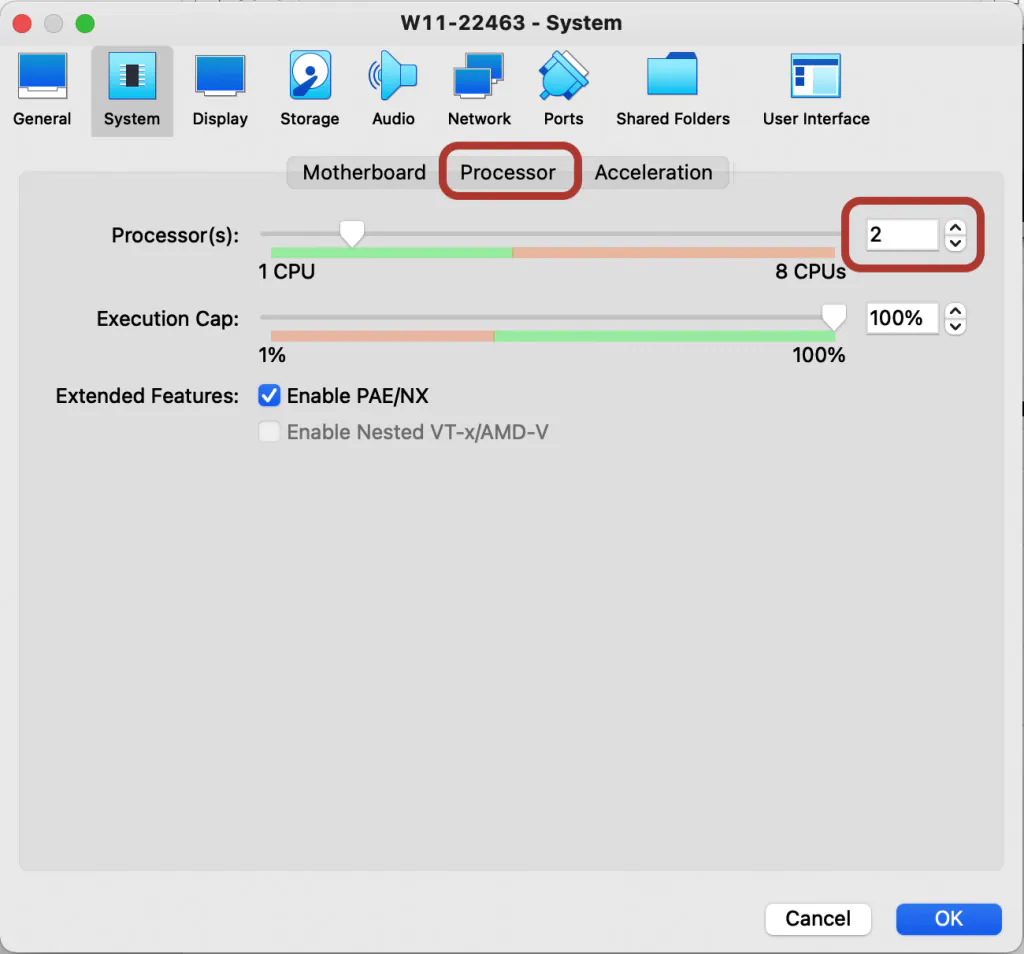
Configuration: System - Processor
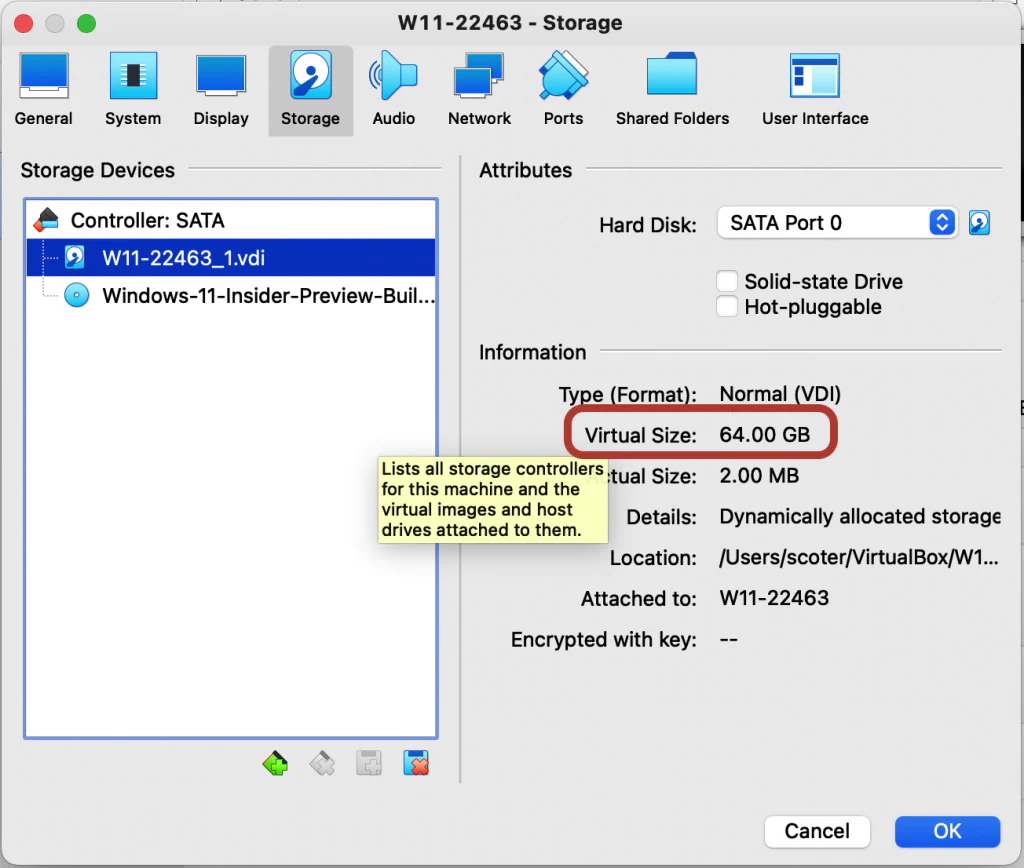
Configuration: Storage
| 64 GB Virtual Disk (minimum size)
|
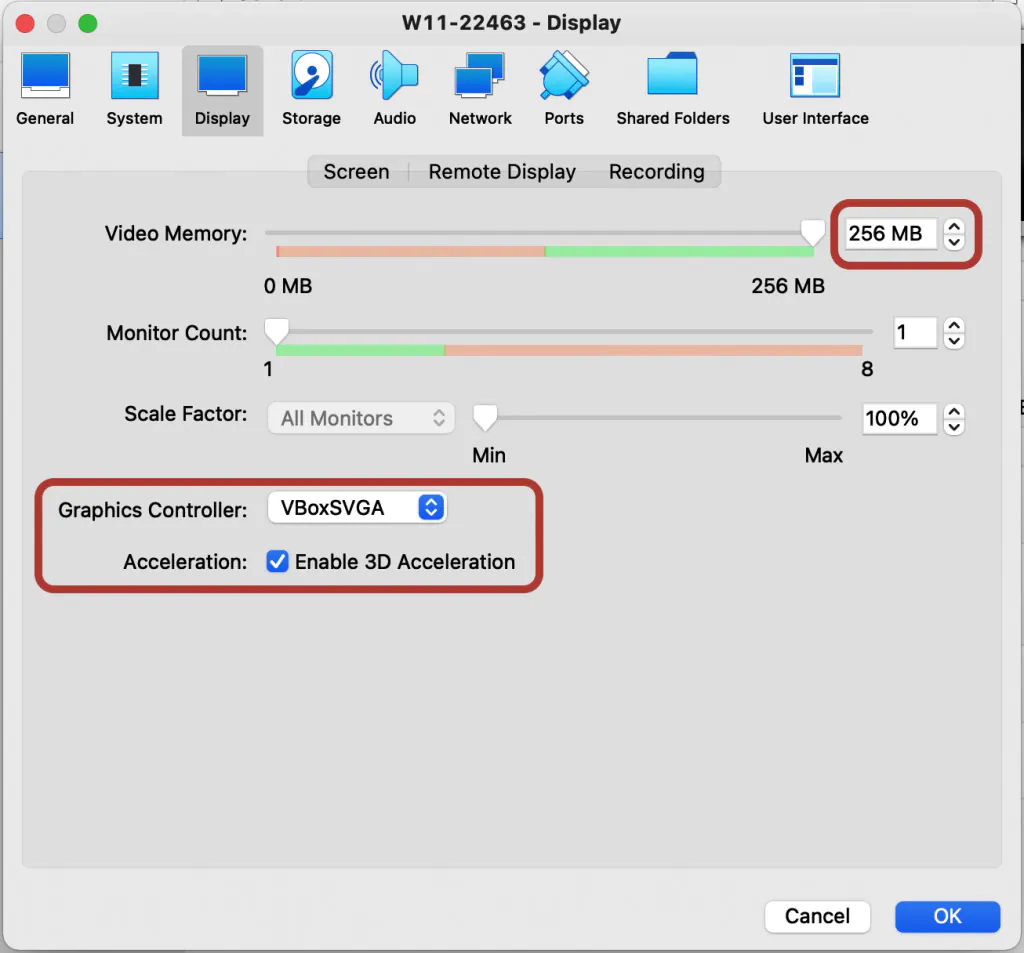
Configuration: Display - Screen
| Video Memory: 256MB
Graphics Controller: VBoxSVGA
Enable 3D Acceleration enabled
|
Installation Process
Note
With those configuration options in-place and the Microsoft Windows 11 ISO properly added as virtual cd-rom we can then start the installation process:
Attach Installation ISO, boot from CD, and launch regedit
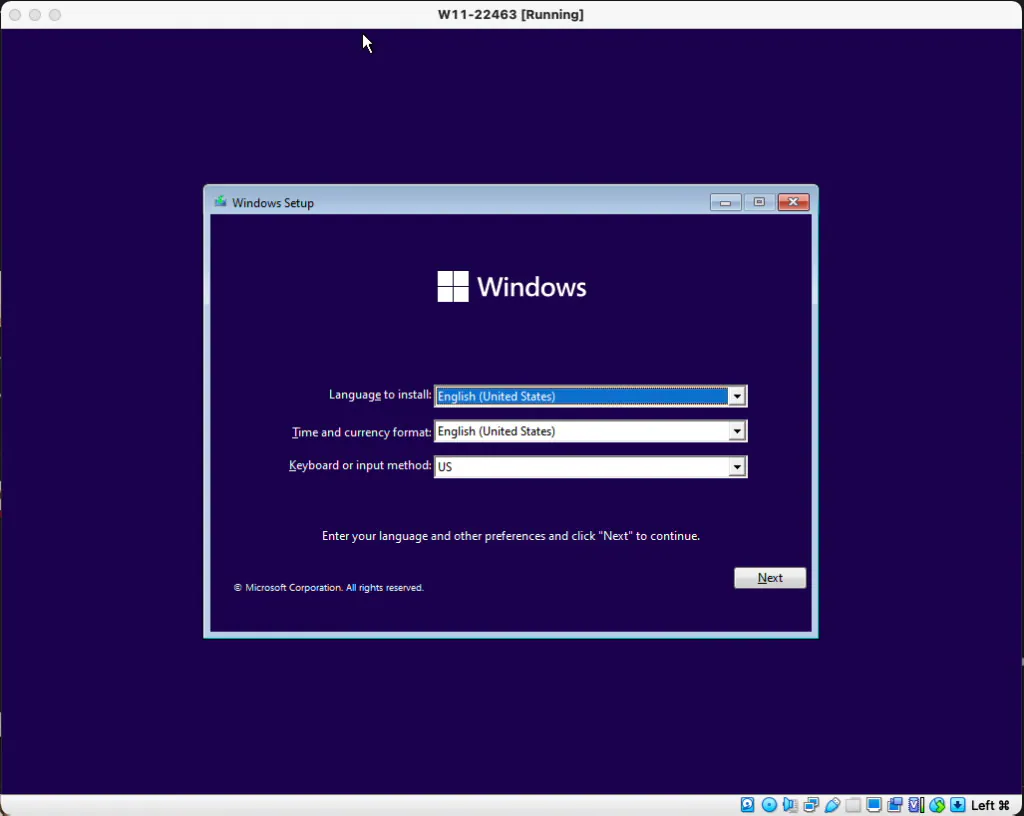
- Click next to show-up the Install now button
- When you see the installation button, Launch a command prompt by pressing Shift+F10 on your keyboard at the same time.
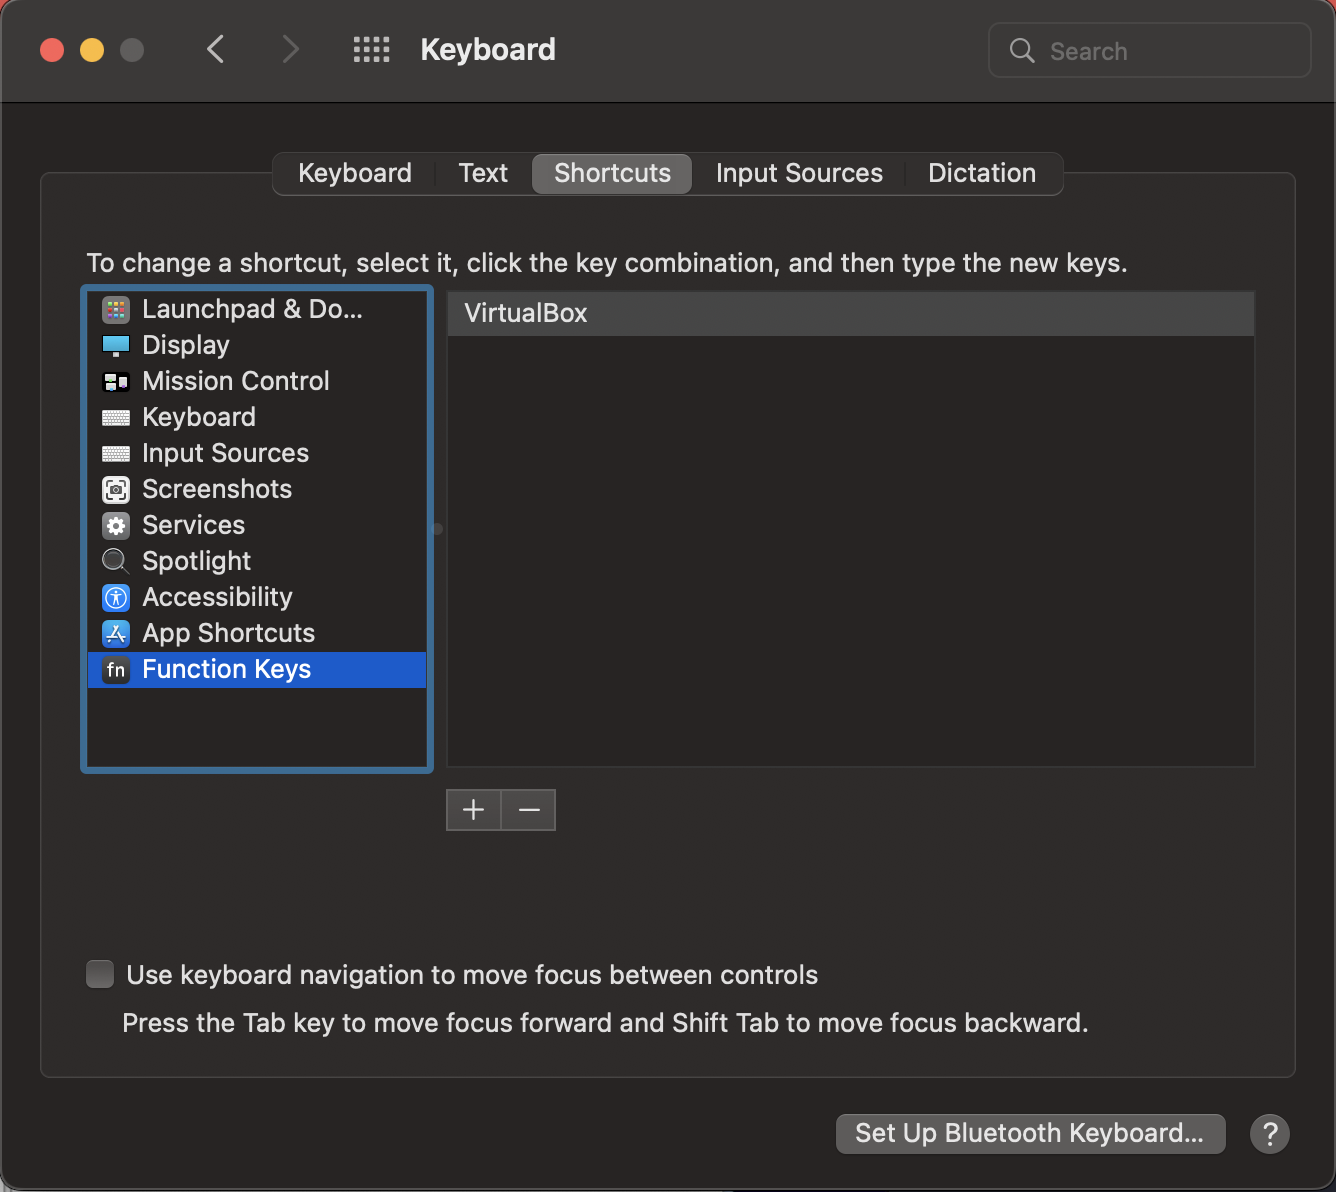
- On some models of MacOS you may need to add the Virtualbox application to Apple Menu - Preferences - Keyboard - Shortcuts (tab) - Function Keys (Left Menu Item)
- At this command prompt, type regedit and press enter to launch the Windows Registry Editor.
Required Regedit Modifications to Bypass TPM Checks
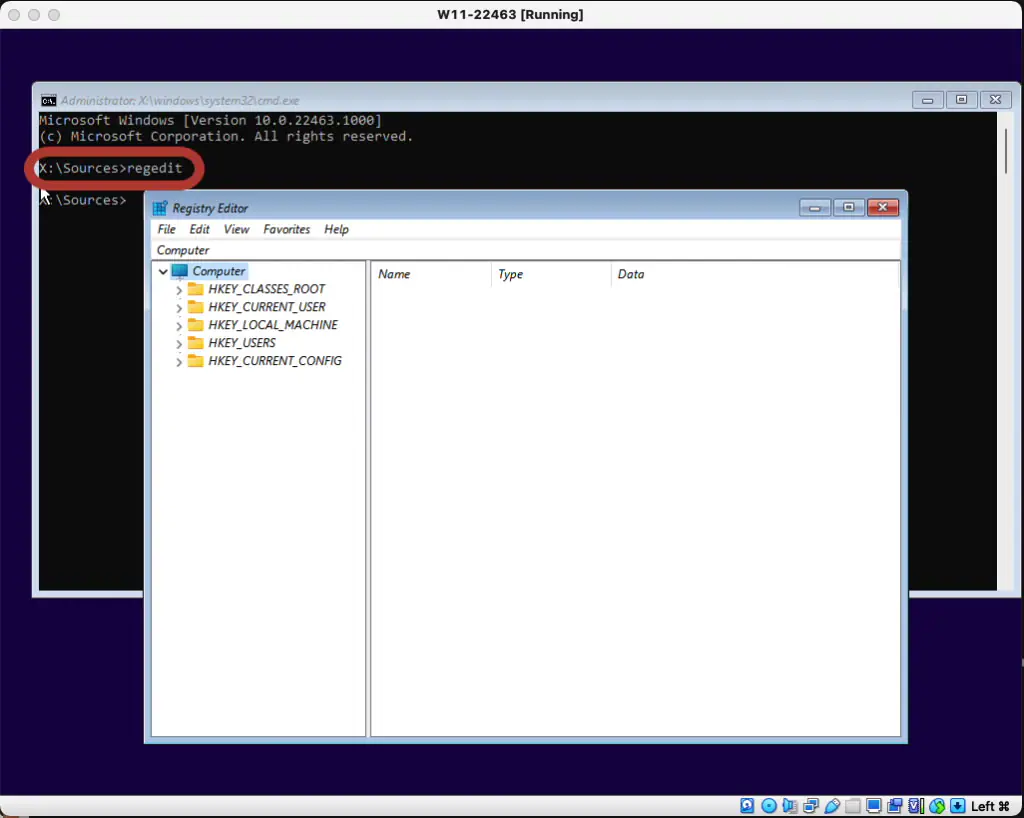
- When the Registry Editor opens, navigate to HKEY_LOCAL_MACHINE\SYSTEM\Setup
- Right-click on the Setup key and select New => Key.
- When prompted to name the key, enter LabConfig and press enter.
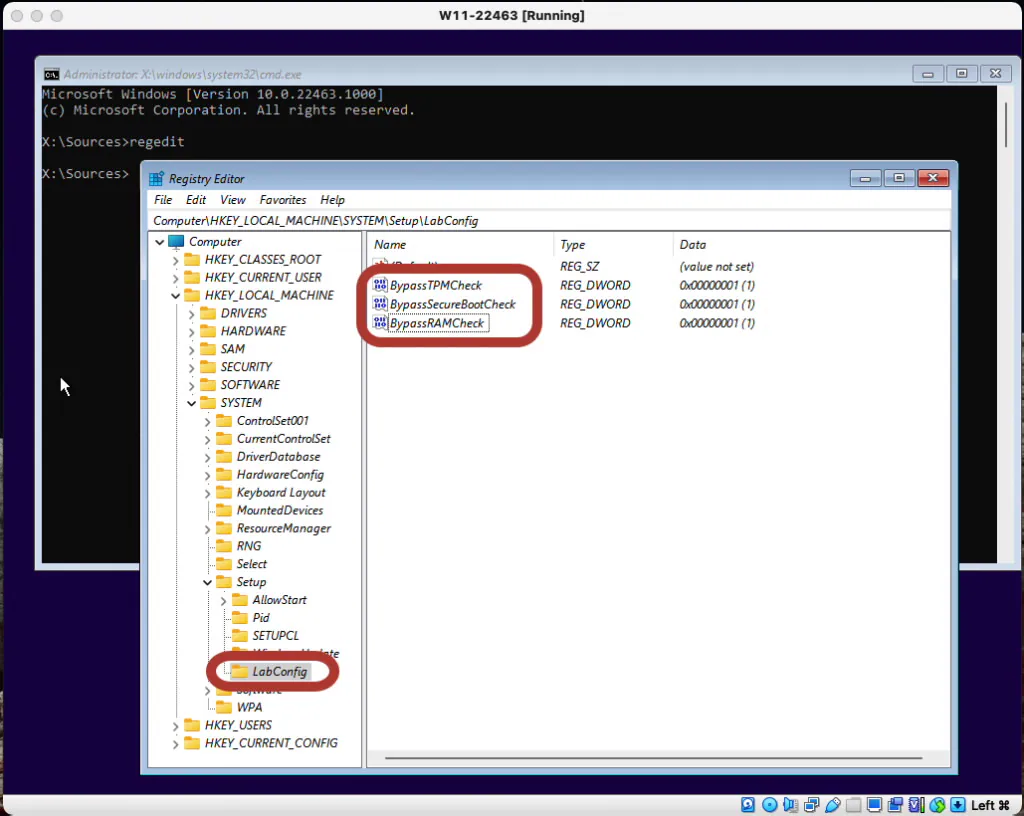
- Now right-click on the LabConfig key and select New => DWORD (32-bit) value and create a value named BypassTPMCheck, and set its data to 1.
- With the same steps as above create the BypassRAMCheck and BypassSecureBootCheck values and set their data to 1, so it looks like the following image.
Final Steps
- With those three values configured under the LabConfig key, close the Registry Editor
- Type exit in the Command Prompt followed by enter to close the window
- You can now click on the Install now button to proceed to get Microsoft Windows 11 installed as a virtual-machine on top of VirtualBox.


